Dimensional issues such as bending, twisting, or bowing in castings often appear after cooling or during machining. These subtle changes can interrupt downstream operations, delay assembly, and result in costly rework. Warpage is a common, yet frequently underestimated, source of such problems.
In metal casting, warpage refers to unintended deformation that occurs when internal stresses, uneven cooling, or inconsistent mold design cause a part to shift out of its intended shape. According to the American Foundry Society, “Dimensional variability in castings due to warpage is one of the most overlooked root causes of downstream failure, especially in precision applications.” The issue typically begins during solidification and becomes more noticeable during later processing steps.
Preventing warpage requires attention to mold geometry, material behavior, thermal control, and post-casting handling. With the right methods in place, distortion can be minimized, dimensional consistency improved, and the need for rework significantly reduced.
Understanding Warpage in Metal Casting
Definition and Characteristics
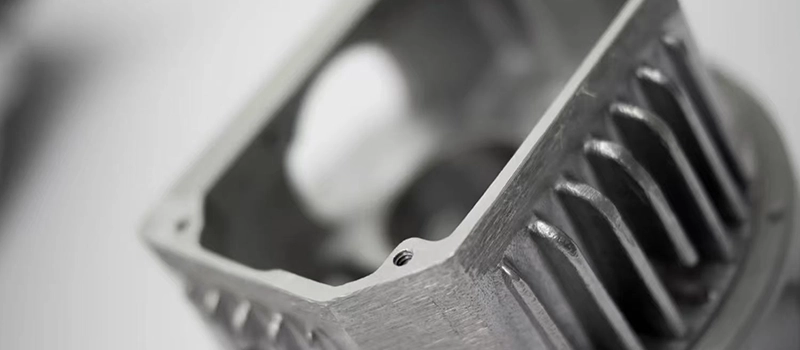
Warpage in metal casting refers to an unintended change in the shape or dimensions of a part that occurs during or after solidification. It is typically the result of uneven contraction or residual stress that causes certain sections of the casting to bend, twist, or deform. This type of distortion may not be immediately visible, especially in large or irregular parts, but it often becomes evident during machining or dimensional inspection.
Unlike shrinkage, which is a uniform reduction in size due to cooling, warpage is characterized by localized bending or curvature. The direction and extent of the deformation depend on several factors, including material properties, cooling rate differences, mold design, and support conditions. Parts with asymmetric geometries or non-uniform wall thicknesses are more susceptible to this type of defect.
When and Where It Occurs
Warpage typically develops during the transition from liquid to solid state, especially when cooling is uneven across different sections of the casting. Inadequate control over mold temperature, metal flow, or riser placement can create areas of internal stress that result in movement once the part is removed from the mold. In other cases, deformation may develop post-casting, during handling, storage, or heat treatment, particularly if the part is not adequately supported.
This form of dimensional inaccuracy is often most apparent in components requiring flat surfaces, tight tolerances, or precise assembly interfaces. Detecting and correcting it early helps maintain downstream process efficiency and product quality.
Primary Causes of Warpage During and After Casting
Uneven Cooling and Thermal Gradients
Warpage often results from inconsistent cooling rates across different areas of a casting. When some sections solidify faster than others, internal stress begins to develop. This mismatch in contraction forces the component to bend or twist once the part is fully solidified. Thinner sections cool more quickly, while thicker areas remain hot for longer, leading to stress differentials between them.
This is especially common in castings with varying wall thicknesses, sharp transitions, or large flat surfaces. The more inconsistent the cooling behavior, the higher the likelihood of deformation. Without thermal balance during solidification, these stresses cannot release uniformly, which often causes the part to move from its intended shape after removal from the mold.
Residual Stress From Mold Constraints
When a casting is over-constrained by the mold or internal cores, it is unable to contract freely during cooling. This lack of movement creates residual stress, which remains locked inside the casting until the mold is opened or the part is ejected. At that point, the stored stress is released as distortion, bending, or twisting—sometimes immediately, sometimes during later handling.
Tight-fitting cores, complex cavities, or molds with excessive rigidity often create this situation. Even small misalignments or uneven core placement can introduce localized restraint that leads to distortion. Properly designed core supports, flexible molding materials where appropriate, and allowance for contraction during solidification can help reduce residual stress buildup.
Wall Thickness Variation and Part Geometry
Inconsistent wall thickness is a common source of warpage. Asymmetrical shapes, unsupported arms, and extended surfaces often cool at different rates. Thin sections cool rapidly and begin to contract before adjacent thicker areas, which remain in a semi-liquid or slower-cooling state. This imbalance leads to internal tension that causes bending or twisting across the part.
Additionally, parts with flat horizontal sections or long flanges are structurally weaker during cooling and more prone to sagging or upward deformation. Without reinforcement ribs, rounded transitions, or uniform wall design, the casting may fail to retain its intended geometry even under normal solidification conditions.
Mold Rigidity and Core Support
The stiffness and layout of the mold system play a major role in warpage. Soft or under-supported molds may shift or compress under the weight of molten metal, allowing unwanted movement during solidification. Conversely, extremely rigid molds may hold the casting in a fixed shape, resisting natural contraction and forcing stress to accumulate.
Poor core placement, missing core prints, or lack of internal bracing can cause internal displacement during pouring. Once the casting cools, these internal imbalances become visible as curved walls, misaligned holes, or shifted dimensions. A balanced mold structure that combines rigidity with dimensional flexibility is essential for stable part formation.
Post-Casting Handling and Storage
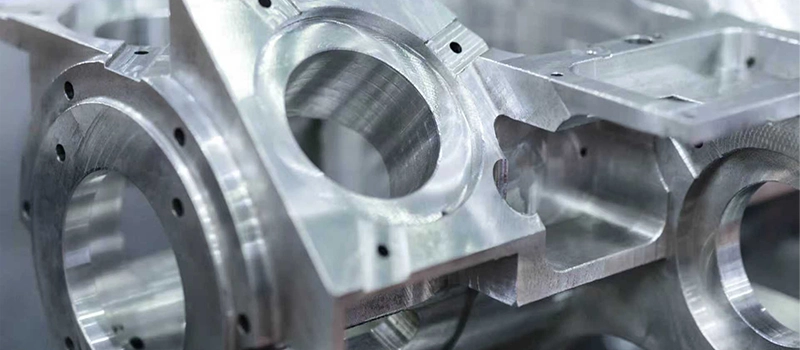
Not all warpage originates in the mold. Parts that are improperly supported during cooling or storage are vulnerable to deformation under their own weight, particularly when still warm. If castings are placed on uneven surfaces, stacked incorrectly, or moved too early, they may gradually bend or sag in unsupported areas.
This issue is most noticeable in long, thin, or flat parts that require structural stability. Without proper cooling fixtures or racks, even well-made castings can lose dimensional accuracy before reaching final inspection. Careful post-mold handling, controlled cooling environments, and prevention of unnecessary movement are critical to maintaining shape integrity.
Methods for Detecting Warpage in Casting
Visual and Dimensional Indicators
Warpage is often first identified through visual inspection or during the early stages of machining and assembly. Common signs include visible bending, misalignment of features, or uneven contact when the part is placed on a flat surface. Parts that are designed to rest evenly may show gaps, rocking, or curvature at the edges.
For parts with tight flatness or straightness requirements, even small deformations can be critical. Visual checks are useful for identifying large, obvious distortions, but more precise tools are required to confirm whether the part meets dimensional tolerances.
Inspection During Machining or Layout
Many cases of warpage are discovered once the part enters machining. If the part does not sit flat on the fixture, shifts during clamping, or produces uneven cut depths, this may indicate a warped casting. Some distortions only become evident once surface material is removed and internal stresses are released.
Use of reference surfaces
Checking machined faces or datum points against layout lines or surface plates helps verify flatness and angular alignment. When parts deviate from the expected geometry, further dimensional inspection is necessary to determine the extent and location of the warping.
Tools for Measuring Warpage
Various measurement techniques are used depending on part geometry, tolerance requirements, and production scale.
Surface plates and feeler gauges
A basic but effective method involves placing the part on a calibrated surface plate and using feeler gauges to check for gaps under flat sections. This approach works well for parts with flat mounting faces, base flanges, or sealing surfaces.
Dial indicators and height gauges
Height measurements at multiple reference points can be used to detect deviation from a baseline. Dial indicators mounted on rigid stands allow quick comparison of edge height or surface flatness. When used correctly, they can highlight warping across the length, width, or diagonal planes of a casting.
Coordinate Measuring Machines (CMM)
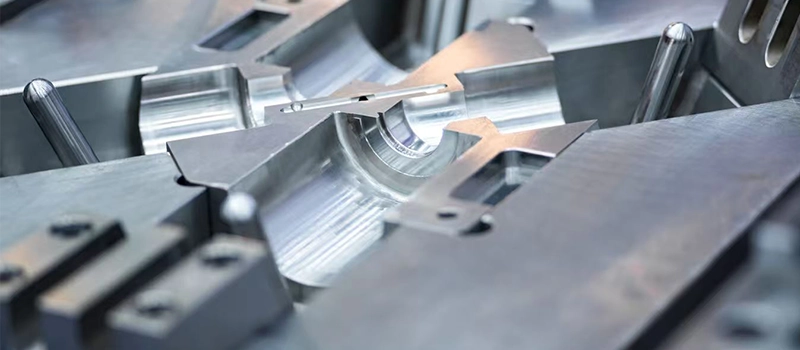
For parts with complex geometry or critical tolerances, CMMs offer the highest precision in warpage detection. These machines generate a 3D map of the part’s surface and compare it to CAD data. Warpage is revealed as deviation from nominal dimensions, and the results can be used to identify patterns or localized deformation.
Timing of Inspection
When and how often to inspect for warpage depends on part criticality and process stability.
After casting and before machining
Initial dimensional checks after casting are useful to identify gross deformation. This allows early rejection or rework before machining time and cost are added. Surface plate checks, basic gauges, or fixture testing are appropriate at this stage.
After machining or heat treatment
Final dimensional inspections should be performed after machining, especially for parts that will be assembled or function as fit-critical components. In some cases, heat treatment can introduce or relieve stress, so flatness should be confirmed after these steps.
Fixture-Based and Functional Checks
In production environments, especially for repeat parts, checking warpage using dedicated fixtures is efficient and reliable. These fixtures simulate the assembly environment or hold the part in a defined position to reveal any distortion.
When a part cannot be mounted, clamped, or mated with its counterpart correctly, warpage is likely present. In some industries, this is the most practical method of detection, as the part must function correctly even if the measured deviation is small.
Impact of Warpage on Machining and Assembly
Effects on Dimensional Tolerance
Warpage directly affects the ability of a cast part to meet dimensional requirements. Even slight deviations in flatness, straightness, or hole alignment can cause the part to fall outside of specification. Once warpage occurs, features such as mounting surfaces, bores, or bolt patterns may no longer align with mating components or jigs.
Increased risk of dimensional non-conformance
If a casting is distorted before or during machining, the reference surfaces may no longer match the intended design. This leads to uneven cuts, inconsistent tolerances, and potential part rejection during final inspection. For precision applications, warpage can result in complete dimensional failure even if the rest of the casting is sound.
Challenges During Machining Operations
Distorted castings can be difficult to clamp or fixture correctly. Parts that rock or lift on machining tables may shift during cutting, leading to tool deflection, inconsistent depths, or tool wear. This not only affects accuracy but also increases the risk of damage to machines, cutters, or the workpiece itself.
Poor surface contact and instability
When a warped part cannot sit flat, it must often be shimmed or adjusted manually, which increases setup time and introduces variability. In multi-face machining operations, the part may shift between setups, creating mismatch between features or unbalanced machining forces.
Assembly Fit and Structural Misalignment
Many cast parts function as structural components or mounting bases. Warpage in these parts leads to poor assembly fit, difficulty in fastening, and overall misalignment with mating parts. In bolted assemblies, distortion may cause uneven gasket compression or pre-load distribution, resulting in leakage or mechanical failure.
Interference and field installation issues
If warpage is not corrected before shipment, the part may fail during installation or field assembly. Holes may not align, surfaces may not seat properly, or the component may introduce stress into adjacent parts. In critical equipment, such failures can delay commissioning, trigger warranty claims, or damage reputation.
Increased Scrap and Rework Costs
When warpage is discovered late in the process, rework becomes more difficult. Machined surfaces may no longer be salvageable, and heat-based correction methods may not restore original tolerances. Rework labor, extra inspections, and additional handling increase production cost without adding value.
Financial impact of late-stage discovery
Parts that cannot be recovered must be scrapped, leading to material loss, additional melting and casting cycles, and extended delivery times. For time-sensitive or high-volume orders, even a small number of warped castings can delay schedules or trigger quality claims from customers.
Delays in Production and Delivery
Warpage affects not only part quality but also the efficiency of the overall workflow. If defects are found during machining or assembly, production lines may be interrupted while replacements are made. Delivery dates are impacted, and downstream operations may be forced to reschedule.
Just-in-time and contract fulfillment risks
In supply chains where parts must arrive on time for integration into larger systems, warpage-related delays can have cascading effects. Late deliveries may breach contract terms or require air freight to compensate, increasing logistics costs and reducing profit margins.
Techniques for Preventing Warpage in Production
Optimize Mold and Core Design
Effective prevention of warpage begins at the design stage. Casting geometry, wall thickness, and mold layout all influence how heat dissipates and stress accumulates during solidification. Consistent wall thickness and balanced geometry reduce the risk of differential cooling, which is a primary cause of distortion.
Apply uniform wall thickness
Designing parts with even wall thickness helps maintain uniform cooling and minimizes internal stress. Where thickness variation is necessary, transitions should be gradual, and thermal simulation may be used to predict risk areas.
Reinforce critical areas
Adding ribs, gussets, or structural support in long or flat sections can help prevent sagging or lifting during solidification. These features add stiffness and promote even shrinkage across large surfaces.
Control Cooling and Solidification Behavior
Uneven cooling is one of the most common causes of warpage. Controlling how heat leaves the casting reduces thermal gradients that create internal stress.
Use chillers and thermal simulation
Chillers placed in strategic locations can help control cooling rates in thick or slow-freezing areas. Thermal simulation software can assist in identifying hot spots and planning riser placement, mold material selection, or chiller configuration.
Balance solidification sequences
Riser and gate placement should ensure controlled metal flow and solidification progression from thin to thick sections. An imbalanced sequence may cause sections to lock in stress before the entire casting has solidified.
Select Suitable Materials and Apply Melt Treatment
Material properties influence how a casting responds to thermal and mechanical stress. Alloys with high shrinkage rates or poor thermal conductivity are more prone to warpage if not properly managed.
Degas and filter molten metal
Proper melt treatment reduces the risk of trapped gas or inclusion-related stress during cooling. Clean, degassed metal ensures more stable shrinkage behavior and reduces internal strain that leads to distortion.
Choose alloys with lower warpage tendencies
Where design allows, using alloys that exhibit lower thermal distortion can help reduce dimensional movement. For example, some aluminum-silicon alloys have better stability than pure aluminum or certain copper-based alloys.
Maintain Mold Rigidity and Core Support
A stable mold system prevents movement during solidification. If cores shift or molds flex under the pressure of molten metal, even minor misalignment can result in post-casting deformation.
Provide secure core prints
Core prints and positioning features should be strong enough to hold internal cores firmly in place. Weak or unsupported cores may float, tilt, or compress, creating unbalanced sections that warp after cooling.
Minimize mold deflection
Large molds or horizontally cast parts should be adequately supported to prevent sagging. Using stronger sand systems or external support structures can help maintain dimensional integrity during casting.
Apply Post-Casting Stress Relief
Stress that develops during casting can sometimes be neutralized through controlled post-casting treatment. This approach is often used for parts with high flatness or alignment requirements.
Use heat treatment when appropriate
Normalizing or stress-relieving heat treatments can relax internal tension and stabilize part geometry. The effectiveness of this method depends on alloy type, casting complexity, and final application.
Machine in multiple stages
In some cases, performing rough machining before heat treatment, followed by finish machining afterward, allows any distortion to be corrected during final processing.
Follow Proper Handling and Storage Procedures
After casting, the way a part is handled and stored can significantly influence its final shape. Unsupported parts may deform under their own weight, especially when still warm.
Cool on flat, stable surfaces
Use cooling racks or fixtures to support critical surfaces during the cooling process. Avoid placing castings on uneven or unstable bases immediately after mold removal.
Avoid premature movement
Transporting or stacking warm castings before they have fully stabilized may introduce permanent distortion. Allow sufficient cooling time and use proper lifting methods to prevent unintended stress.
Troubleshooting and Process Corrections During Production
Identifying the Source of Distortion
When dimensional deviation is detected in cast parts, the first step is to determine whether the issue is isolated or process-related. Examining multiple parts from the same batch can help identify patterns. If only one casting is affected, it may result from localized mold damage or handling error. If several show similar distortion, a systemic issue in the mold design, cooling process, or material preparation is more likely.
Process records—such as pouring temperature, mold drying time, and cooling duration—should be reviewed to identify deviations from standard practice. Visual mapping of the affected areas on multiple castings can also reveal consistent stress points or deformation zones.
Get a quote now!
Immediate Actions for In-Process Issues
If dimensional issues are detected early, before machining or assembly, it may be possible to isolate and correct the problem without halting production. In low-volume settings, adjusting mold supports, drying cycles, or cooling methods between pours can help minimize further deviations.
In higher-volume operations, continued production while investigating the root cause must be approached cautiously. A hold-and-inspect approach may be needed to prevent defective parts from reaching downstream stages. This avoids the cost of machining or finishing parts that are later found to be out of tolerance.
Examples of quick intervention
- Increasing support under long sections of the mold to reduce sag
- Adding or relocating chillers to improve solidification control
- Verifying binder curing in cores to ensure structural stability during pouring
These types of field-level adjustments can often be implemented without a complete tooling redesign.
Communicating with the Foundry or Tooling Supplier
When the distortion originates from tooling, mold layout, or process setup outside of internal control, clear communication with the casting supplier is essential. Accurate description of the issue—including measurements, photos, and CAD overlays—helps the foundry identify whether adjustments to core prints, gating, or risers are needed.
A collaborative troubleshooting session can shorten resolution time. In many cases, tooling adjustments can be made without full replacement by modifying existing components or optimizing venting, riser location, or mold clamping force.
Managing Castings With Minor Deviation
Not all deviations require full rejection or rework. In some applications, slight distortion may be acceptable if it falls within the functional tolerance range. For example, a flange surface that deviates slightly from flatness may still be acceptable if gasket compression remains uniform.
However, deviation from design intent should be evaluated case by case. Functional testing, assembly trials, or approval from engineering teams may be necessary before allowing parts with minor deformation to proceed.
Process Improvements for Long-Term Stability
Once the root cause is confirmed, corrective actions should be documented and added to future production plans. These may include mold reinforcement, longer drying cycles, thermal simulation analysis, or revised handling protocols. Standardizing these controls reduces variability in future batches and strengthens the overall process.
Where recurring distortion is difficult to eliminate, small design adjustments may be recommended to increase stiffness or symmetry in the affected areas. In some cases, a minor change to wall thickness, rib placement, or material selection can reduce sensitivity to internal stress.
Conclusion
Uncontrolled dimensional changes in castings can lead to higher production costs, delayed delivery, and customer dissatisfaction. By identifying the causes of warpage early and applying consistent process controls, manufacturers can improve part stability, reduce rework, and maintain tight dimensional accuracy across batches. Prevention is most effective when addressed from design to final handling.


