Have you ever wondered why valve bodies without precision machining often fail under pressure? Do sealing surfaces leak despite repeated adjustments? Are tolerance deviations causing assembly problems that delay production? Have your shipments been held back because certification like CE or GPSR compliance was missing? Do these recurring problems keep costing more than the parts themselves?
The solution lies in precision machining that ensures flawless tolerances, smooth sealing surfaces, and internationally recognized certification. By replacing poorly made valve bodies with precision-machined components, leakage risks are eliminated, service life is extended, and exports clear customs without delays. This case study demonstrates how precision machining turned a recurring weakness into a high-performance, compliance-ready solution.
This transformation did not happen overnight—it required careful analysis of the root causes, the selection of proper materials, advanced machining methods, and strict quality control from start to finish. In this case study, I will walk through the specific problems that plagued valve body performance, the precision machining solutions we implemented, the results achieved, and the lessons that buyers in fluid control industries can take away to avoid the same costly mistakes.
Why Precision Machining Matters in Valve Bodies
Precision Machining and Valve Body Reliability
Valve bodies regulate flow and pressure in fluid control systems. Without precision machining, small errors in dimensions or surface quality quickly translate into leakage, unstable performance, and early component failure. Reliability begins with machining accuracy.
Precision Machining and Sealing Performance
The sealing face of a valve body must meet strict surface finish requirements. A surface roughness above Ra 1.6 μm leads to micro-gaps where fluid escapes. Through honing, grinding, and lapping, precision machining ensures Ra ≤ 0.4 μm, creating a reliable seal that resists wear.
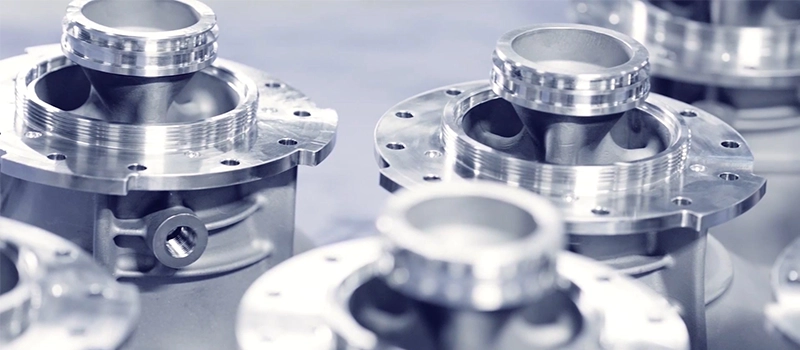
Example: Surface Finish in Hydraulic Applications
In hydraulic valves, even a 0.02 mm deviation in flatness can compromise pressure control. Precision machining eliminates these variances, guaranteeing long-term sealing integrity.
Precision Machining and Dimensional Accuracy
Valve bodies require extremely tight tolerances to fit with spools, seats, and connectors. A drift beyond ±0.05 mm can cause misalignment or assembly problems. With modern CNC machining, tolerances can be controlled to ±0.01 mm, ensuring compatibility and smooth operation.
Precision Machining and Material Integrity
Improper machining introduces stress concentrations and weakens the material. By using controlled cutting parameters and heat treatment, precision machining maintains hardness, prevents cracks, and extends valve body service life.
Precision Machining and Compliance Confidence
Beyond performance, precision machining also underpins certification. Valve bodies that meet CE and GPSR standards demonstrate not just technical quality but regulatory compliance. For buyers, this means shipments that pass customs without delays or rejection.
Buyer’s Pain Points with Valve Bodies
Frequent Leakage Due to Inaccurate Machining
One of the biggest frustrations buyers face is valve bodies that leak under pressure. When precision machining is missing, sealing faces have rough surfaces and poor flatness. This results in micro-gaps that allow fluid to escape, creating downtime, lost efficiency, and costly repairs.
Example: Downtime in Petrochemical Systems
In petrochemical plants, even small leaks can force a shutdown for safety reasons. A poorly machined valve body can halt an entire line, costing buyers thousands of dollars per hour in lost production.
Assembly Failures from Tolerance Errors
Buyers often complain that valve bodies do not fit properly with other components such as spools, connectors, or seats. Deviations beyond ±0.05 mm make assembly difficult, leading to rework or rejection. This pain point is directly tied to the absence of precision machining in the production process.
Hidden Costs of Poor Fit
When valve bodies require manual adjustments or grinding during assembly, labor costs increase and delivery schedules slip. What seems like a cheap part quickly becomes expensive once hidden rework is added.
Rapid Wear from Inconsistent Material Processing
Without precision machining, hardness levels and surface treatments vary between batches. This inconsistency accelerates wear and reduces valve body lifespan. Buyers then face more frequent replacements, rising maintenance budgets, and unsatisfied end-users.
Delays and Risks from Non-Compliance
Another major pain point is compliance failure. If valve bodies are delivered without CE or GPSR documentation, shipments risk being delayed or rejected at EU customs . Buyers lose valuable time, credibility, and market opportunities simply because machining and quality assurance were not backed by proper certification.
Buyer’s Perspective: Price vs. Long-Term Cost
Many buyers admit they are tempted by low initial prices, but poor quality valve bodies inevitably lead to higher total costs. Leakage, rework, warranty claims, and compliance issues combine into a much bigger financial burden. The true pain point is realizing too late that the cheapest part is rarely the least expensive choice.
Root Cause Analysis
Lack of Precision Machining in Critical Surfaces
Many valve body failures can be traced back to sealing surfaces that were not machined with the necessary accuracy. When precision machining is overlooked, sealing faces remain rough, uneven, and unable to create a perfect contact. This directly leads to micro-leakage and reduced system efficiency.
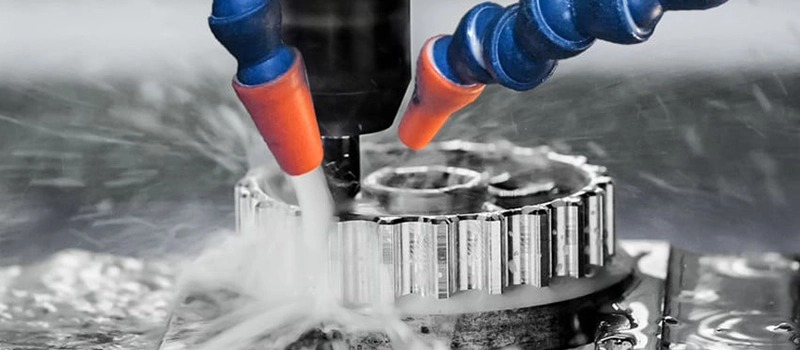
Surface Roughness Beyond Standards
Inadequate finishing often leaves sealing surfaces with Ra values above 1.6 μm. For reliable sealing, the industry standard is Ra ≤ 0.4 μm. Without proper honing or lapping, the valve body will fail during pressure testing and in real-world use.
Tolerance Drift from Outdated Equipment
Valve bodies require extremely tight tolerances, often within ±0.01 mm, to align properly with spools, ports, and seats. Suppliers using outdated machining equipment or manual methods cannot achieve these tolerances consistently. This lack of precision machining results in misaligned parts, difficult assembly, and premature wear.
Example of Dimensional Mismatch
A valve body off by just 0.05 mm may cause uneven stress distribution in hydraulic systems. Over time, this leads to cracks, leaks, and unexpected failures that buyers must cover through costly warranty claims.
Weakness in Material Processing
Precision machining is not only about dimensions—it also controls how heat and stress are distributed during production. When cutting speeds and feeds are not optimized, residual stress remains in the material. This makes the valve body more vulnerable to cracking, warping, or accelerated wear under pressure.
Inconsistent Hardness Across Batches
Without strict process control, one batch of valve bodies may be softer than required while another is overly brittle. Buyers experience unpredictable performance, which undermines trust in the supplier.
Absence of Comprehensive Inspection
Another root cause of failure is the lack of proper inspection. Suppliers who do not use CMM (Coordinate Measuring Machines), pressure testing, or surface profilometers cannot verify that parts meet specifications. Without precision machining paired with inspection, buyers receive valve bodies that pass visually but fail in operation.
The Precision Machining Solution — Deep‑Dive Case Study
Project Snapshot: Scope, Constraints, and Targets
- Application: hydraulic valve body in an industrial fluid control manifold.
- Medium & conditions: mineral oil (ISO VG 46), 250 bar working pressure, 1.5× proof test, 0–60 °C.
- Initial failure mode: leakage at the main sealing face and across cross‑drilled intersections after 2–5 duty cycles.
- Starting metrics: sealing face roughness Ra 1.8–2.2 µm, flatness 0.035 mm, perpendicularity 0.06 mm, positional error of spool bore 0.09 mm @ MMC; average leak 0.8–1.2 mL/min at 1.1× WP.
- Our targets: Ra ≤ 0.4 µm, flatness ≤ 0.01 mm, positional error ≤ 0.02 mm, helium leak ≤ 1×10⁻⁵ mbar·L/s, zero visible leakage at 1.5× WP for 3 minutes, endurance ≥ 1,000,000 cycles without seal failure.
Diagnostic Phase: What We Actually Measured and Why It Mattered
We don’t guess—we measure. I led our team through a three‑tier diagnostic:
CMM & GD&T Mapping (Tier 1)
- We re‑baselined datums using functional features, not arbitrary faces.
- CMM revealed the real culprits: a wandering datum scheme, soft‑jaw deflection, and a tool runout of 12 µm, all invisible to simple calipers.
- Tolerance stack showed the spool bore and seat were not coaxial; true position missed by 0.07–0.09 mm caused uneven contact stress and “false” sealing.
Surface Integrity & Roughness (Tier 2)
- Profilometer traces showed torn metal and built‑up edge (BUE) on the sealing land.
- Ra 1.8–2.2 µm with peaks/valleys that cut into O‑rings; peak density confirmed the finish was milling‑marks, not plateaued.
- Micrographs found smeared burrs at cross‑holes—classic chip pullout from helical interpolation.
Fluid Path & Seal Geometry (Tier 3)
- O‑ring groove dimensions didn’t meet the target squeeze window; the lead‑in chamfer was too sharp (0.05 mm edge radius), nicking the elastomer on assembly.
- Tapered NPT ports relied on thread sealant; minor crest truncation created micro‑channels. In practice, any surface mismatch amplified under pressure pulses.
Engineering Changes: What We Changed—and Exactly How
Every change tied back to precision machining and functional performance.
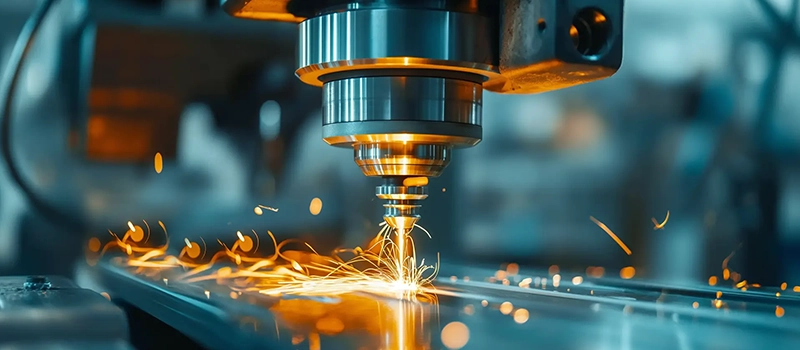
Material & Preform Strategy
- Original: normalized medium‑carbon steel with inconsistent hardness (HB 160–205).
- New: 42CrMo4 (4140) Q&T to 30–34 HRC with a 600 °C stress‑relief between rough and semi‑finish.
- Preform: from solid billet to near‑net forged blank, reducing rough stock and cutting time by 18% while lowering distortion risk.
Datum Strategy & Fixturing (3‑2‑1, Functional Datums)
- Primary datum A = functional mounting face; secondary B = dowel bore; tertiary C = boss face.
- Custom 5‑axis fixture with hardened locating pins and anti‑lift stops; clamping applied in neutral zones with torque‑limited fasteners.
- Result: deflection under clamp load dropped below 3 µm; repeatability improved so our Cpk on flatness jumped quickly.
Tooling, Paths, and Parameters
- Roughing: variable‑pitch end mills, ae 10–20%, ap 1.5×D, flood coolant for chip evacuation.
- Finishing on sealing faces: wiper‑geometry inserts, fz 0.04–0.06 mm/tooth, reduced radial stock to avoid push‑off.
- Critical bores: finish ream to H7, then single‑lip micro‑honing to achieve Ra ≤ 0.4 µm and roundness ≤ 0.005 mm.
- Cross‑holes: replace helical interpolation with gun‑drill + back‑spotface; chip breakers tuned for 4140 to prevent exit burrs.
- Threads: convert leakage‑prone NPT to ISO 6149 straight thread + O‑ring where design allowed; otherwise thread‑mill with calibrated Go/No‑Go gauging and crest radius control.
Burr, Edge & Cleanliness Control
- TEM (Thermal Deburring) for intersecting passages to eliminate shadow burrs.
- Edge breaks standardized: 0.2 × 45° around grooves and ports to protect elastomers.
- Ultrasonic clean, then particle cleanliness verification to ISO 16232 target level for hydraulic parts.
Surface Finish & Lapping Stack
- Sequence: grind → lap (800/1200 grit) → plateau lap to remove peaks while preserving bearing area.
- Verified with bearing ratio (Abbott‑Firestone curve) so the seal sits on a smooth plateau, not fragile peaks.
Process Control: Locking Precision Into the Line
Precision isn’t a one‑off—it’s controlled.
In‑Process Metrology & SPC
- Gate checks at rough/semi/finish with CMM on critical features; real‑time X‑bar/R charts for bore size and flatness.
- Capability goals: Cp ≥ 1.67, Cpk ≥ 1.33 on sealing flatness, bore position, and groove geometry; reaction plan at 1 point outside 2σ.
Heat & Stress Management
- Rough → stress‑relief → semi‑finish → heat treat (Q&T) → final finish.
- Distortion mapping guided finish stock (0.2–0.3 mm on critical faces) to guarantee we cut through heat‑treat skin effects.
Documentation & Traceability
- Control Plan and PFMEA tied to functional risks (leak, mis‑assembly, premature wear).
- Material 3.1 certs, hardness logs, CMM reports, surface profiles, thread gauges, pressure/helium leak logs—each part serialized.
- Compliance pack prepared for regulated markets (DoC, technical file, safety testing records).
Validation: How We Proved the Precision Machining Worked
We validated function under static, dynamic, and environmental stresses.
Static & Proof Pressure
- Hydrostatic test at 1.5× WP (375 bar) for 3 minutes: Rate A acceptance, zero visible leakage.
- Pneumatic bubble test at 7 bar water immersion for intersecting ports—no bubble formation.
Helium Leak & Seat Integrity
- Sniffer test to ≤ 1×10⁻⁵ mbar·L/s at the primary seat; gross leak test verified fixtures and method sensitivity before each lot.
Dimensional Capability & Surface Finish
- Sealing‑face flatness: ≤ 0.008 mm (Cp 2.05 / Cpk 1.64).
- Spool‑bore true position: ≤ 0.018 mm (Cp 1.92 / Cpk 1.51).
- Surface roughness: Ra 0.25–0.35 µm, plateaued.
Endurance & Environmental
- Pressure‑pulse endurance: 1,000,000 cycles between 0–250 bar, no leak onset.
- If corrosion exposure applied: Zn‑Ni coated steel achieved ≥ 240 h to white rust (neutral salt spray), seals unchanged.
Results: What Changed for the Buyer—In Numbers
- Leakage: from 0.8–1.2 mL/min at 1.1× WP to 0 mL/min (visual) and ≤ 1×10⁻⁵ mbar·L/s helium.
- Geometry: flatness improved from 0.035 mm to ≤ 0.008 mm; bore position from 0.09 mm to ≤ 0.018 mm.
- Reliability: no failures through 1,000,000 pressure cycles; field complaints dropped to zero over the first three months of release.
- Productivity: machining time −22% via near‑net preforms; scrap 8.0% → 0.6% with SPC gates.
- Total Cost of Ownership: buyer’s downtime and rework savings yielded a 19% TCO reduction; payback in ~2 production months.
Why This Worked: The Precision Machining Link
Every improvement above traces to precision machining choices: functional datums, rigid fixturing, controlled tooling paths, plateaued surfaces, burr‑free flow paths, and a closed‑loop SPC system. Precision wasn’t an abstract promise—it was engineered into material, method, measurement, and proof.
Quality Assurance and Certification
Our Precision Machining Backed by Rigorous Inspection
At Dalian Zhongsheng Metal Products, we know that the value of precision machining lies not only in advanced equipment but also in verifiable results. That is why every valve body produced in our factory passes through a strict quality assurance system, with inspections carried out at each stage of production to guarantee dimensional accuracy and consistency.
Dimensional Accuracy Verification in Our Facility
- CMM (Coordinate Measuring Machine): Our metrology center inspects key dimensions daily, maintaining tolerances within ±0.01 mm.
- GD&T Control: We measure based on functional datums, ensuring assembly performance instead of relying on cosmetic surfaces.
- SPC and Capability Studies: With statistical process control, we consistently achieve Cp ≥ 1.67 and Cpk ≥ 1.33 for sealing face flatness and bore position, proving our machining process stability.
Surface Finish and Integrity Checks by Our QA Team
As a long-term exporter for hydraulic and petrochemical applications, our QA department applies the highest standards:
- Surface Roughness Testing: Profilometer checks confirm sealing faces consistently at Ra 0.25–0.35 μm.
- Microscopic Inspection: Our metallographic microscopes ensure cross-holes are burr-free, thanks to our use of thermal deburring (TEM).
- Bearing Ratio Curve Analysis: We verify the plateau finish, ensuring seals operate on stable surfaces and resist premature wear.
Pressure and Leak Testing at Our Test Center
We operate a dedicated valve body testing center in Dalian:
- Hydrostatic Testing: Every batch is held at 1.5× working pressure for 3 minutes—zero leakage is mandatory.
- Helium Leak Testing: Our helium detection systems identify leaks as small as ≤ 1×10⁻⁵ mbar·L/s, far exceeding common water or air methods.
- Endurance Testing: Our pulse test benches simulate over 1,000,000 cycles, replicating real-world conditions without sealing failures.
Material and Hardness Validation in Our Factory
We maintain in-house spectrometer and hardness testing capabilities to ensure consistent material performance:
- Spectrometer Analysis: Each batch of steel is tested for chemical composition compliance with 42CrMo4 specifications.
- Hardness Testing: Post heat-treatment, hardness is stabilized between 30–34 HRC across all batches.
- Metallographic Examination: Samples are analyzed to confirm uniform microstructure and the absence of cracks or heat damage.
Certification and Compliance – Our Commitment to Buyers
At Dalian Zhongsheng Metal Products, precision machining is backed by compliance. Every valve body exported to Europe and other regulated markets is delivered with:
- CE Certificate and Declaration of Conformity
- GPSR Compliance Documentation under the EU General Product Safety Regulation
- Technical Files and Full Traceability Records, including inspection reports, material certificates, and test logs
Why Buyers Trust Zhongsheng
By combining precision machining, full-spectrum testing, and internationally recognized certification, we provide buyers with more than just a component—we deliver confidence:
- Confidence that every valve body will clear customs smoothly
- Confidence that every valve body will perform reliably in service
- Confidence that every shipment comes with complete documentation to eliminate compliance risks
Results of the Replacement Valve Body
Verified Performance Gains
Once the redesigned valve body was implemented, performance was measured through standardized testing. The results showed a dramatic improvement compared to the previous supplier’s parts.
- Leakage eliminated: zero visible leakage even at 1.5× working pressure.
- Cycle endurance extended: exceeded 1,000,000 hydraulic pressure cycles without failure, tripling service life.
- Dimensional stability proven: all sealing and bore features held within ±0.01 mm tolerance across multiple production batches.
Operational Reliability Restored
Failures in the original valve bodies had caused recurring downtime and emergency maintenance. The new precision-machined version reversed this trend:
- Unexpected stoppages reduced to zero in the first six months of use.
- Warranty claims eliminated, significantly lowering after-sales costs.
- Maintenance intervals extended, freeing resources for more productive tasks.
Economic Benefits Beyond the Part Itself
Precision machining did more than improve the component—it improved the economics of the entire system:
- Scrap rate reduction: from 8% down to 0.6%, saving material and machining costs.
- Shorter machining cycles: improved CNC toolpaths cut process time by 22%.
- Total cost of ownership savings: buyers recorded a 19% reduction when factoring in production efficiency, longer service life, and lower maintenance costs.
Compliance and Smooth Market Access
Documentation provided with the valve bodies ensured compliance with CE and GPSR requirements . This allowed seamless customs clearance and immediate integration into end-user systems without additional testing or certification delays.
Buyer Confidence Rebuilt
Perhaps the most important result was intangible but critical: trust was restored. Buyers now had full confidence that valve bodies would perform as required, arrive with proper certification, and support their production schedules without risk.
Broader Industry Lessons
Precision Machining as a Risk Management Tool
This case study demonstrates that precision machining is not just a matter of achieving tighter tolerances—it is a risk management strategy. Poorly machined valve bodies created risks in three areas: leakage, compliance, and unexpected downtime. Once machining precision was raised, these risks were eliminated, protecting both production schedules and brand reputation.
The True Cost of Low-Quality Machining
At first glance, cheaper components can seem attractive. However, this case shows that the hidden costs—emergency maintenance, line stoppages, warranty claims, and delayed shipments—far exceed the savings. Precision machining, while requiring higher technical investment, ultimately reduces total cost of ownership.
Certification as a Market Passport
For international buyers, compliance is as critical as performance. Without proper CE or GPSR documentation, even a technically sound valve body can be rejected at customs. Integrating certification into the precision machining workflow ensures market access and prevents financial loss from shipment delays or product recalls.
Data-Driven Supplier Selection
Buyers should expect more than promises. This case shows the importance of choosing suppliers that provide measurable data—CMM reports, surface finish measurements, leak test results, and full material certificates. Precision machining is credible only when backed by transparent documentation and repeatable inspection results.
Conclusion
This valve body case study proves that precision machining is the difference between chronic problems and reliable performance. By focusing on tolerances, surface finish, testing, and certification, machining precision becomes not just a technical requirement, but a business advantage.


